Hey all. I made my first two packages on nuget.org, today. I must say, it's a lot easier than it was the last time I looked into it. No .nuspec file is required. Uploading at the end of an Azure DevOps pipeline is a snap. The NuGet part of the problem is officially painless.
If you want to cut to the chase, the packages are here:
- HexagonSoftware.SpecFlowPlugins.ImportSharedFeaturesDuringGeneration
- HexagonSoftware.SpecFlowPlugins.GenerationFilter
I think it makes sense to explain what they do, what they are for, and how to use them, though.
Import Shared Features During Generation
The former is not really a plugin for SpecFlow so much as it is an extension of the .csproj MsBuild ecosystem. It allows you to designate a reference to a set of feature files. Each such reference points to an external folder (presumably full of feature files) and maps it to a folder inside the project.
This is accomplished by editing the .csproj file and adding a fairly-standard-looking reference to it. Here's an example:
<SpecFlowFeaturesReference
Include="..\HexagonSoftware.SpecFlowPlugins.ImportSharedFeaturesDuringGeneration.Import"
ImportedPath="SharedFeatures" />
That will cause all the feature files under ..\HexagonSoftware.SpecFlowPlugins.ImportSharedFeaturesDuringGeneration.Import (relative to the project root, of course) to copied to SharedFeatures (again, project-relative)
prior to test-generation.
The internal folder (in this case, SharedFeatures) is completely controlled by the reference. Everything in it is destroyed and rebuilt every build. For my own sanity, I add those folders to my .tfignore (or .gitignore, if I'm feeling masochistic).
Unfortunately, at this time, the best way I was able to get it to work was by making a folder under the project root. In the future and have the files actually be a part of the project while generation occurs. This has a little to do with how difficult it was to access the internals of the SpecFlow generation task from a plugin and a lot to do with how difficult actually getting a reference to the task assembly is.
I'll probably crack it eventually.
I'm sure there are many cases I haven't considered but, of course, the ones I have considered are tested.
Generation Filter
This plugin allows you to control which parts of a feature file are actually generated into tests. You do this by specifying sets of tags that include or exclude scenarios or features from generation.
The tag selection is controlled by a JSON file at the root of your project. The JSON file must be named "specflow-test-filter.json".
Its format looks something like this:
{
"included-tags": [ "@In" ],
"excluded-tags": [ "@Stripped" ]
}
As it should be, exclude tags always trump include tags.
Why Both?
These two plugins work together nicely. The first one allows me to reuse feature files. The second allows me to generate a subset of the scenarios within a project. As a result, I can create the SpecFlow equivalent of a "materialized view" within my test suite. Each test assembly can be a subset of all the tests I use for Dwindle.
Before, I relied on environment variables to select tests and set the test mode. Now, the place that a feature file is instantiated sets all the context required.
This worked perfectly in my automated gates. Maybe it was even convenient. At the very least it teetered on the edge of convenience but it was a real pain in the ass for my local development environment.
For one thing, I had to fiddle with environment variables if I wanted to switch between unit, client, or API tests. I was able to kludge my way past that, though: I have three different test runners installed in my Visual Studio instance and each one is configured differently.
Another problem - probably a more important one - is that it made it hard for me to push a button and run all the tests. As I migrate over to using these plugins, I'll be able to run all my tests in a single batch.
Before, the only tests that were convenient to run locally were the unit tests. Those were so fast that I could run them any time I wanted. Everything else was a batch of tests ranging from 30 seconds (just long enough to be infuriating) to ten minutes.
When I'm done migrating to this structure, I'll have a choice. I can right-click and run whatever test I want in whatever context I desire. I can select a ten-minute batch and go get some coffee. I can set up a run that takes an hour and go for a swim or walk.
I'll probably circle back on this with an experience report when the migration is done. My automated gates will all have to change (at little). I'm guessing, in the course of the migration, I'm going to need to add a few more features and refine the workflows a little, too.
Maybe it won't help you the way it (already) helps me but I figured I should build this as NuGet packages for the next person with the same problem.
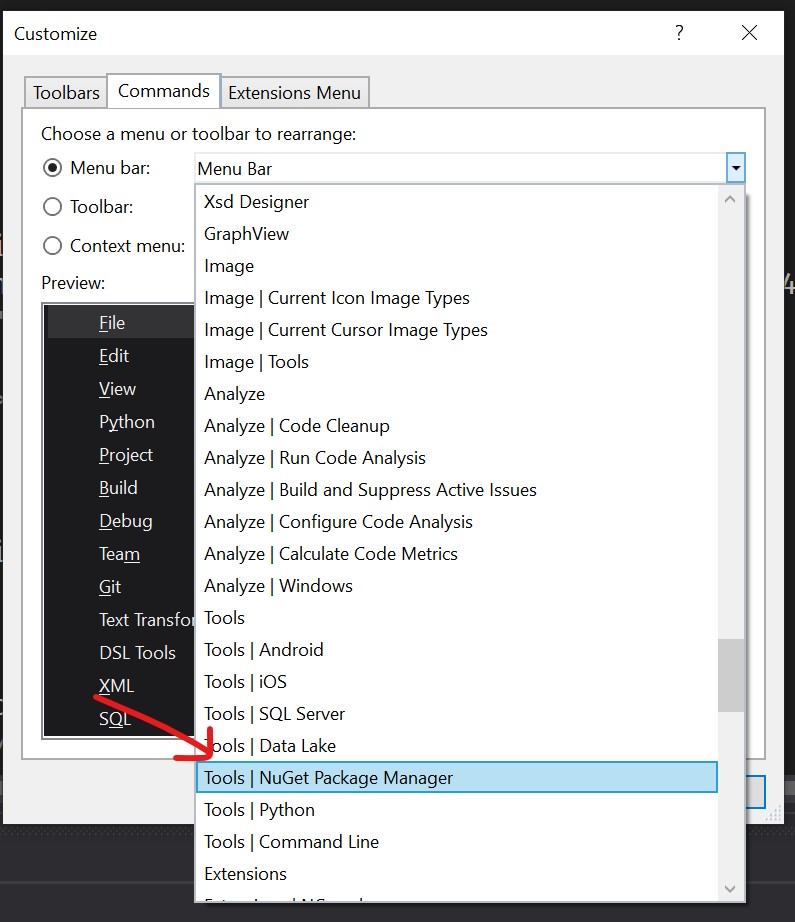
 I like to tend to my NuGet dependencies a lot and my preferred view for doing so is the "Manage NuGet Packages for Solution" window. This can be accessed from the context menu (below), the tools menu (further below), or the search bar (third below).
 The first option is pretty quick except that you have to scroll up in your Solution Explorer. So it's kind of disruptive. You also have to fish through a meaty context menu but it's near the top and in a predictable way. So, with the power of habit, this one can be made reasonably cheap.
 I've been trying to train myself to type Ctrl+Q and then find the option but, for some reason, it just won't take. Even with my trick for retraining muscle memory, I just couldn't make myself do it the new way.